Downloads
- Stop Drop Installation Guide
- Visual Inspection Checklist (before install)
- Site Handover Register (after install)
Inspect the net for any damage prior to install, record this in your visual inspection register with serial number, date, time and sign off. *(see visual inspection register)

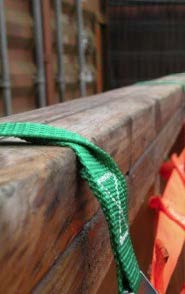
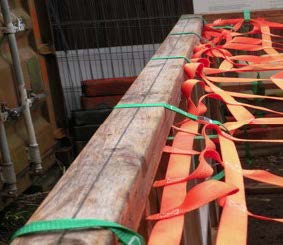
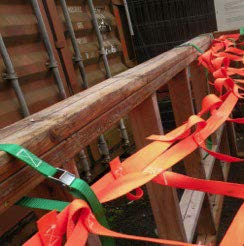
Starting in the corner of the room wrap cam buckle straps (use only Stop Drop branded straps) around double top plates and through 2 webbing strands.

Attach 1 strap each side of the corner 150mm from the corner (for 2 total straps per corner).

Work along one side Locating cam buckle straps at 900 centres maximum along frames or divided up evenly. Work your way around the rest of the walls in the room.

There should be a minimum of 15 connection points in every room divided up evenly. Any strap connection can have a hanger ring instead of wrapping the strap around the framing if this suits the situation better.

Use the hangers if you have gable ends or larger lintels. Use a type 17 14 gauge 75mm screw & screw hanger to the top plate, (Screws can be used only once) place hangers at 450mm centres maximum spacing.

Once you have the net fully erected pull the cam buckles up tight but not too tight as to deflect frames.

Straps must not be twisted and it is imperative you feed the strap through from the underside.

Ensure straps are not twisted!
If you have excess net on one or two sides, just bunch the webbing together and wrap the cam buckle straps around all of this and tie off as above. Do this along the whole edge that has excess net.


The net should have some sag, 100mm minimum and 400mm Maximum. There should always be a minimum clearance under the net of 2 meters to allow clearance for the net to absorb a fall.
If room is larger than 5 meters in any direction, two internal support straps should be installed beneath net.

I.e. If you’re doing a 6m x 6m room a ratchet tie down strap (2000kg strength) should be fixed from corner to corner. Attach a hanger ring with M10 75mm coach screw to corner of top plates, attach ratchet pulled up tight under the net. (see diagram below)

Where joining of nets is required, overlap webbing of nets 3 full squares and secure with cam buckles straps on every second square on alternating sides.

In this situation a 2000kg strap is installed in the centre of the overlap. It should be woven through each square in an under and over arrangement. Connect at both ends to a hanger ring connected to top plates with M10 75mm coach screw. (see diagram below)

Check that gaps along edge of net are no more than 100mm. If there is, add more straps.

Correctly attached with no gap.

Badly attached with large gap.
Inspection of nets is recommended at weekly intervals and recorded on weekly checklist.
If any net is installed in any one location for a longer period than 6 months it shall be inspected by a competent person and registered on your visual inspection register.
Removing the Stop Drop net:
- Check net while still in place for any damage.
- Report any damage to the appropriate person.
- Remove straps in reverse from install, trying to keep net off the floor to prevent it getting wet or dirty. This helps your net last as long as possible.
- Check net and straps for any damage. Report faults to the appropriate person.
- If using the type 17 screws discard them after each use (Do not reuse them as they can weaken with use).
- Check date of manufacture of net and cam buckles. If older than 5 years remove from service.
- Store nets when dry, in a dry place out of the sun.
